Introduction
Small kitchens bring unique challenges. Limited space, poor lighting, or outdated styles often leave homeowners frustrated. Many dream of a remodel, but costs and disruptions pose big barriers. Renovations can exceed budgets and take weeks or months. Yet, transforming a small kitchen does not need to drain wallets or require professionals for every step.
This article shares 10 budget-friendly small kitchen upgrades. These ideas deliver notable impact with modest investments. Many projects fit well into a weekend, and you can do them yourself. From refreshing cabinets and countertops to new lighting and smart storage, these upgrades pack a punch.
You will find practical tips for surfaces, hardware, lighting, storage, and finishing touches. Each idea balances style and function. Even renters who cannot make structural changes will find options.
Ready to reshape your kitchen without big expenses or stress? Let’s jump into simple upgrades that will brighten and organize your smaller space.
High-Impact Surface Transformations
Changing big surfaces drastically improves kitchen look. Cabinets, countertops, and backsplashes occupy large visual areas. Fresh updates here can feel like a full makeover.
The Cabinet Refresh (Paint or Refacing)
Cabinets take up most kitchen wall space. Painting them brightens the room and modernizes style. Paint is affordable and offers endless color choices. For about $50 to $150, a DIY paint job can transform stale cabinets.
DIY Steps:
- Clean surfaces well using mild detergent.
- Sand cabinets to remove gloss.
- Apply primer to ensure paint adhesion.
- Use cabinet-specific paint with a durable finish.
- Apply paint with a smooth brush or roller.
- Add simple molding for a custom look (optional).
Experts on HGTV say proper sanding and priming increase paint durability, lasting years without chipping. Studies show low-VOC paints improve indoor air quality.
Refacing cabinets adds new veneer or doors without replacing the entire unit. This costs more but still beats new cabinets, ranging from $300 to $800 depending on materials and labor.
Internal link: Check out our detailed “How to Paint Kitchen Cabinets” guide for step-by-step instructions.
External link: Review Sherwin-Williams’ cabinet painting guide for best products.
The Countertop Update (Paint, Epoxy, or Contact Paper)
Countertops receive heavy use and hold visual focus. Replacement often costs $1,000 or more, but cheaper fixes exist. Countertop paint kits and epoxy paints create a fresh surface at a fraction of the price ($50-$150).
Heavy-duty contact papers or vinyl wraps provide easy peel-and-stick solutions. These resist water and stains well but may require gentle care to last.
DIY Tips:
- Sand countertop lightly.
- Clean thoroughly.
- Follow epoxy kit instructions carefully.
- Apply thin coatings for durability.
- Seal edges for protection.
Paint kits give more color options but need more effort. Contact paper is quick but less long-lasting. Epoxy offers strong, glossy finishes but needs patience during curing.
Keywords: Cheap kitchen updates, DIY kitchen upgrades.
The Backsplash Boost (Peel-and-Stick or Stencils)
Backsplashes protect walls and add style. Peel-and-stick tiles brighten kitchens affordably, costing about $20-$60 per square foot. Variety includes gel-look tiles, vinyl, or metal textures. These resist heat and moisture in most kitchen zones.
Stencils offer a creative option when walls or old backsplashes appear dull. Use stencils with painter’s tape for neat geometric patterns or faux tile looks.
DIY Tips:
- Measure backsplash area carefully.
- Cut peel-and-stick tiles precisely.
- Apply from bottom up to avoid bubbles.
- For stencils, use painter’s sponges for even paint coverage.
Once dry, backsplashes brighten your entire cooking zone instantly.
Internal link: Read “Best Peel-and-Stick Backsplashes” for top picks.
Brightening Up: Hardware & Lighting Hacks
Small details add big style and function to your kitchen.
The Hardware Swap
Cabinet handles and knobs are like jewelry for the kitchen. An instant style update costs $2-$10 per piece from big box stores or online shops. Different finishes include brass, matte black, or brushed nickel.
DIY Tips:
- Match new hardware with existing hole placements.
- Use a template for drilling new holes if needed.
- Clean surrounding areas before installing hardware.
- Tighten screws firmly but avoid over-tightening.
Changing hardware is a simple weekend task and refreshes old cabinets beautifully.
Internal link: See our guide on “Choosing the Right Kitchen Cabinet Hardware.”
The Lighting Layer (Under-Cabinet & Statement Fixture)
Lighting affects mood and usability. Task lighting under cabinets improves visibility for chopping and cooking. Ambient lighting creates a warm, inviting atmosphere.
Options:
- Battery-powered LED strips or puck lights (easy to install, no wiring).
- Plug-in under-cabinet lights powered by wall sockets.
- Hardwired LED strips for permanent solutions (may need an electrician).
- Replace a dated ceiling fixture with a stylish pendant or flush mount.
Energy-efficient LED bulbs save power and last longer. The U.S. Department of Energy reports LEDs reduce electric bills by 60% compared to incandescent bulbs.
Internal link: Explore affordable under-cabinet lighting choices.
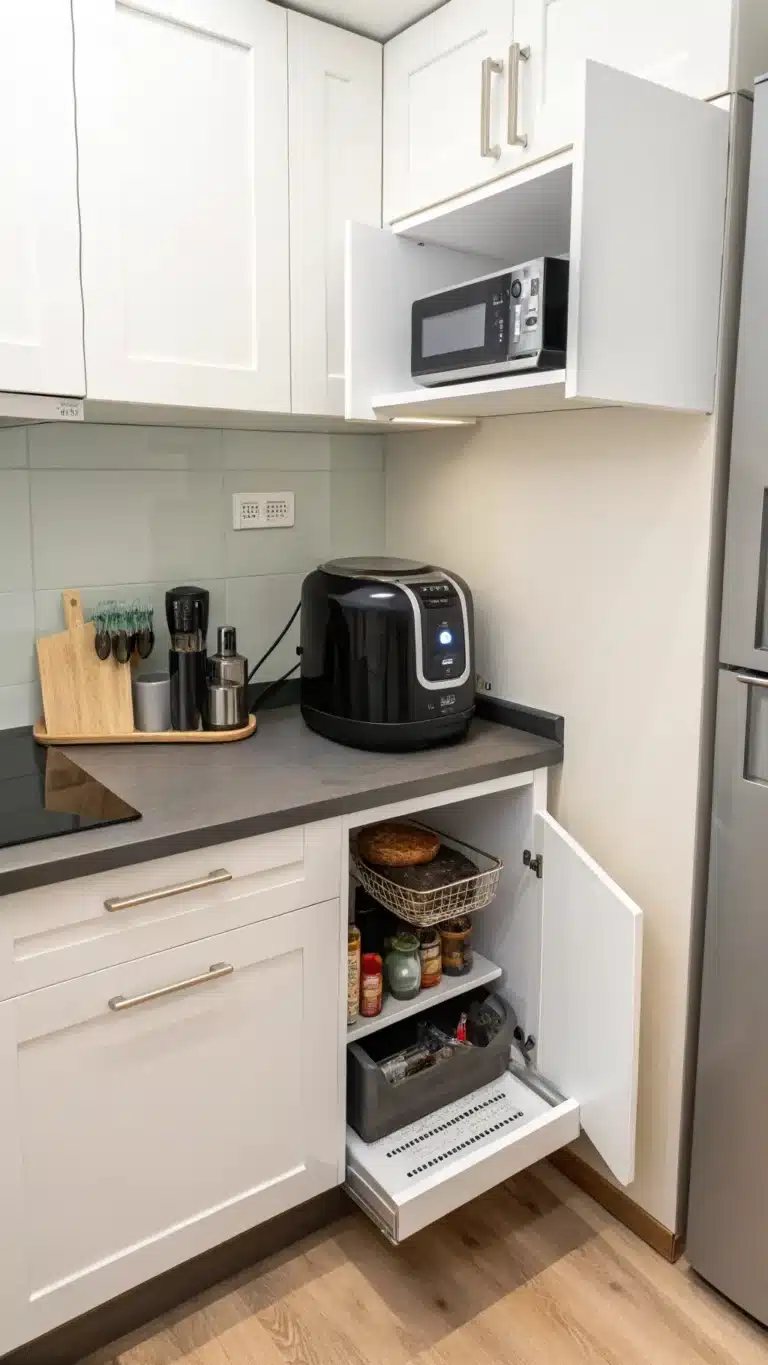
Maximizing Space: Smart Storage & Organization
Limited kitchen space requires smart storage that fits your lifestyle.
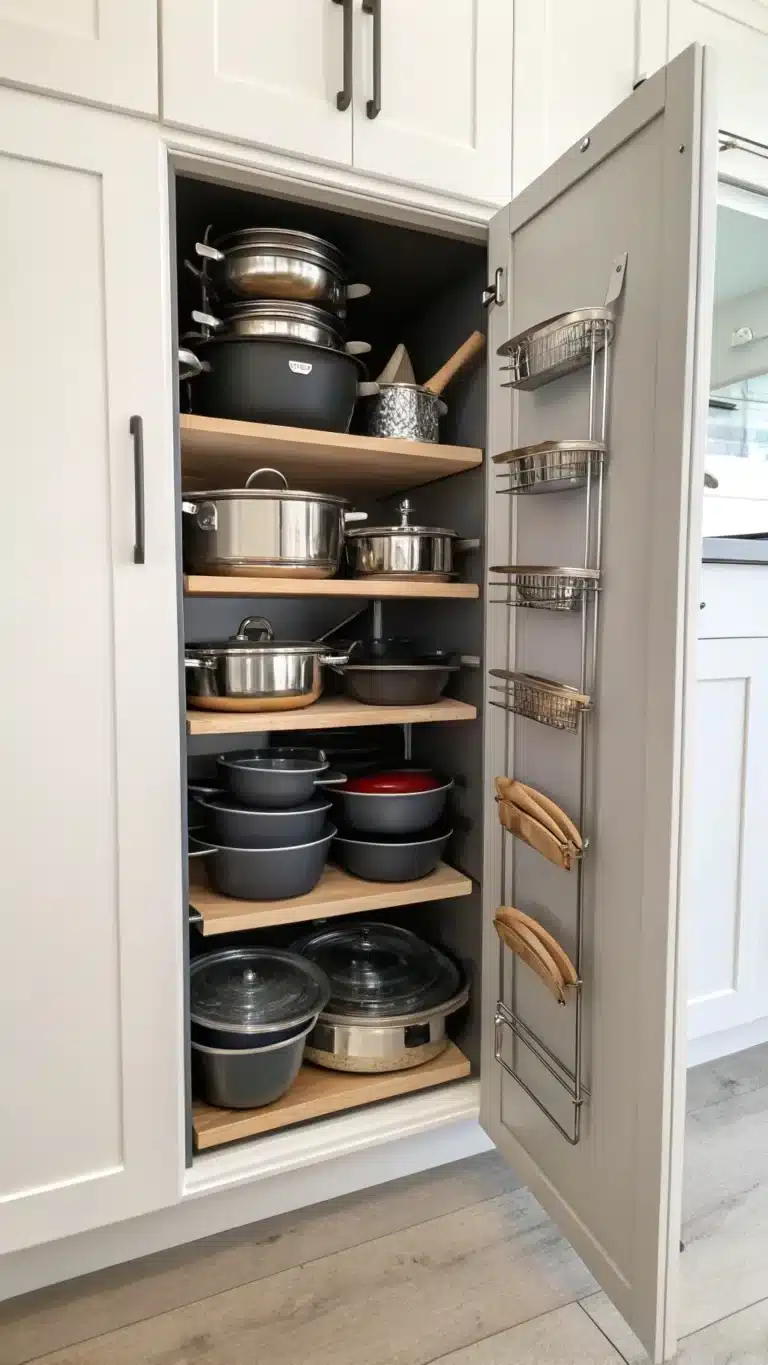
Inside Cabinet & Drawer Organizers
Transforming inside cabinets reduces countertop clutter. Drawer dividers keep utensils sorted. Pull-out shelves create easy access to pots and pans. Door-mounted spice racks save shelf space.
DIY Tips:
- Use wooden scraps or purchase inexpensive dividers.
- Measure drawer interiors before buying inserts.
- Install pull-out baskets with basic screws.
- Organize spices alphabetically for efficiency.
Experts recommend arranging items by frequency of use to improve flow.
Wall-Mounted & Vertical Storage
Using vertical space clears counters and drawers. Open shelves display attractive dishes or cookbooks. Pegboards hold pots, pans, and utensils visibly but neatly. Magnetic knife strips protect blades and free drawer room.
DIY Tips:
- Fix brackets and shelves at eye level.
- Securely mount pegboards with anchors.
- Clean walls and surfaces before attaching hangers.
These solutions cost under $50 and look professional when done right.
The Mobile Island/Cart
A rolling cart is versatile for small kitchens. It adds a work surface, storage, or a serving area. Options range from budget finds at IKEA or Amazon to DIY refinished pieces.
DIY Tips:
- Choose carts with locking casters for stability.
- Sand and repaint used carts.
- Add butcher block tops for durability.
Mobile islands cost $50-$300, a useful feature that moves wherever needed.
Fixtures, Features & Finishing Touches
Small finishing touches add personality and polish to your kitchen.
The Faucet Facelift
A new faucet updates the sink area instantly. Choose models with pull-down sprayers or touchless features for convenience. Prices range from $70 to $250 depending on style and features.
DIY Tips:
- Turn off the water supply before removal.
- Use adjustable wrenches and plumber’s tape.
- Follow included instructions carefully.
- Hire a plumber if unsure; faucet replacement is easier than full sink swaps.
A well-reviewed faucet improves both look and function.
Textiles & Decor
New curtains or valances soften the space and add color. A durable rug brightens floors and adds warmth. Wall art or framed prints give personality. Display kitchens tools in nice containers to blend storage and decor.
Plants bring freshness and clean air. According to NASA’s studies, certain houseplants reduce indoor toxins, a growing trend for natural spaces in 2025.
Ideas:
- Washable rugs in bright colors.
- Simple café curtains for privacy without blocking light.
- Ceramic crock for wooden spoons.
- Small potted herbs near windows.
Budget-friendly décor refreshes kitchen style with very low cost.
FAQs
Q1: How much does it cost to do budget kitchen upgrades?
Costs vary from $100 to $1,500 depending on scope. DIY saves most money. Paint and hardware swaps cost under $200. Storage solutions and lighting vary by product.
Q2: Can I really paint my kitchen cabinets myself, and will it last?
Yes, painting works with good prep and proper paint. It lasts years when done carefully. Patience for sanding and priming reduces peeling.
Q3: What’s the easiest and cheapest kitchen upgrade I can do this weekend?
Try swapping hardware, adding peel-and-stick backsplash, or new textiles. These take little time and money.
Q4: How can I add more storage to a tiny kitchen without remodeling?
Use vertical shelves, pegboards, drawer organizers, and mobile carts for extra space.
Q5: Are peel-and-stick backsplashes durable or do they look cheap?
Quality products resist heat and moisture and look realistic. Careful application prevents peeling and bubbles.
Conclusion
Transforming a small kitchen does not need a big budget. The ten budget-friendly small kitchen upgrades discussed improve both looks and function. Painted cabinets, refreshed countertops, stylish hardware, better lighting, and smart storage all add up.
Making small changes creates a bright, organized, and cozy kitchen space. Many projects work well for renters and DIYers.
Pick one upgrade to start refreshing your kitchen today. Explore linked guides for clear instructions. Share your own upgrade stories with us. Discover other small space living ideas to complement your project.
A better kitchen awaits, without breaking your budget.