Unlock the secret to delicious, homemade pasta that rivals your favorite Italian restaurant. Making perfect pasta from scratch is easier than you think. Our guide reveals 10 simple secrets to help you master fresh pasta in minutes, transforming simple ingredients into a meal you’ll be proud to serve.
Introduction
Tired of store-bought pasta? Imagine serving a bowl of tender, fresh pasta you made yourself. It’s an amazing feeling, and it’s much simpler than you might believe. Many people think making pasta from scratch is a huge project, but it doesn’t have to be. We’ve collected 10 easy-to-follow secrets from top home cooks and Italian grandmothers to help you get it right every time. You don’t need fancy equipment or special skills—just a few simple hacks to get that perfect texture and taste. Get ready to impress your family and friends with a delicious, authentic meal. This guide will walk you through everything from the best flour to the perfect cooking time, so you can enjoy fresh pasta in a flash.
Why These Secrets?
Making fresh pasta seems hard. But it’s not with the right tips. These secrets make the process simple. They save you time and effort in the kitchen.
You get better results without the guesswork. The pasta will have a perfect texture. It will taste so much better than store-bought kinds.
These hacks are also budget-friendly. You use basic ingredients you might already have. It’s a fun and rewarding cooking project for anyone.
10 Secrets to Perfect Pasta
🍝 1. The Right Flour Makes All the Difference
:max_bytes(150000):strip_icc()/__opt__aboutcom__coeus__resources__content_migration__serious_eats__seriouseats.com__2020__05__20200520-flour-types-vicky-wasik-8-whole-wheat-flour-text2-a9ee04ea79b64132bb73a1c2c2ebaeee.jpg)
Summary: The type of flour you use is the single most important factor for perfect pasta texture. While all-purpose flour works, using fine “00” flour, a staple in Italy, creates a silkier, more delicate dough that is easier to roll and results in a lighter, more tender bite after cooking.
Quick 5-Step Summary:
Start with all-purpose flour for an easy entry.
For a smoother dough, try “00” flour.
Mix flours if you can’t find “00” flour alone.
Sift the flour for an airier texture.
Keep extra flour on hand for dusting.
Time: 5 minutes
Tags: Essential, Ingredients
💡 Tip: Semolina flour adds a slightly nutty flavor and a firmer texture, great for pasta that holds up to thick sauces.
🍝 2. The Golden Ratio of Eggs and Flour

Summary: The ideal ratio of eggs to flour is critical for a dough that is neither too sticky nor too dry. A good starting point is one large egg for every 100 grams of flour. This creates a rich, pliable dough that is easy to work with and full of flavor.
Quick 5-Step Summary:
Measure flour precisely for consistency.
Use one large egg per 100g of flour.
Add a little water if the dough is too dry.
Add a little flour if the dough is too wet.
Adjust based on egg size and humidity.
Time: 5 minutes
Tags: Beginner-Friendly, Technique
💡 Tip: For a deeper color and richer flavor, use egg yolks only. This results in a very luxurious dough.
🍝 3. Mastering the “Well” Method
:max_bytes(150000):strip_icc()/__opt__aboutcom__coeus__resources__content_migration__serious_eats__seriouseats.com__recipes__20141222-pasta-making-collage-mixing-792cc3378024451f9f765ff99f1676f8.jpg)
Summary: The traditional “well” method is a time-tested way to mix pasta dough. By creating a mound of flour with a hollow in the center for the eggs, you control the mixing process, preventing a messy spill and ensuring the flour is gradually incorporated for a uniform dough.
Quick 5-Step Summary:
Pour flour onto a clean surface.
Form a well in the center of the flour.
Crack eggs into the well.
Use a fork to slowly whisk eggs.
Gradually pull flour from the sides into the center.
Time: 5 minutes
Tags: Traditional, Technique
💡 Tip: If you’re a beginner, use a large bowl instead of a countertop to prevent spills and make cleanup easier.
🍝 4. Kneading for a Silky, Elastic Dough
Summary: Proper kneading develops the gluten in the dough, which is essential for its elasticity and final texture. Kneading for 8-10 minutes by hand creates a smooth, firm, and elastic dough that will hold its shape when rolled and cooked.
Quick 5-Step Summary:
Push the dough away with the heel of your hand.
Fold the dough over itself.
Rotate the dough slightly.
Repeat for 8-10 minutes.
The dough should feel smooth and spring back when pressed.
Time: 10 minutes
Tags: Technique, Patience
💡 Tip: If your arms get tired, take a short break. The kneading process is a workout!
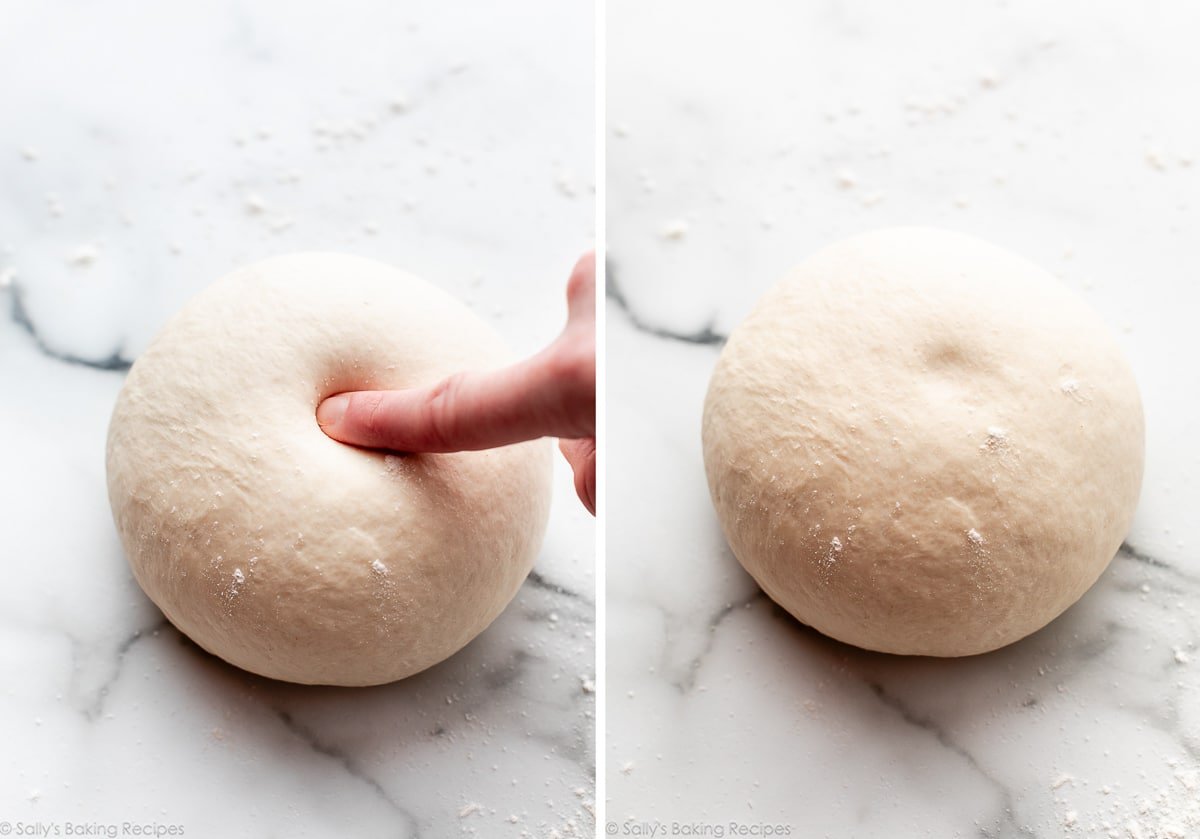
🍝 5. The Importance of a Good Rest
Summary: Resting the dough is a non-negotiable step. It allows the gluten to relax, making the dough much easier to roll out thinly without it snapping back. A 30-minute rest at room temperature is all you need for a perfectly pliable dough.
Quick 5-Step Summary:
Form the dough into a ball.
Wrap the dough tightly in plastic wrap.
Set it aside on the counter.
Let it rest for at least 30 minutes.
The dough should feel soft and easy to work with.
Time: 30 minutes
Tags: Essential, Quick
💡 Tip: Never skip the rest! Trying to roll out un-rested dough will lead to frustration.
🍝 6. Rolling Dough to the Perfect Thickness
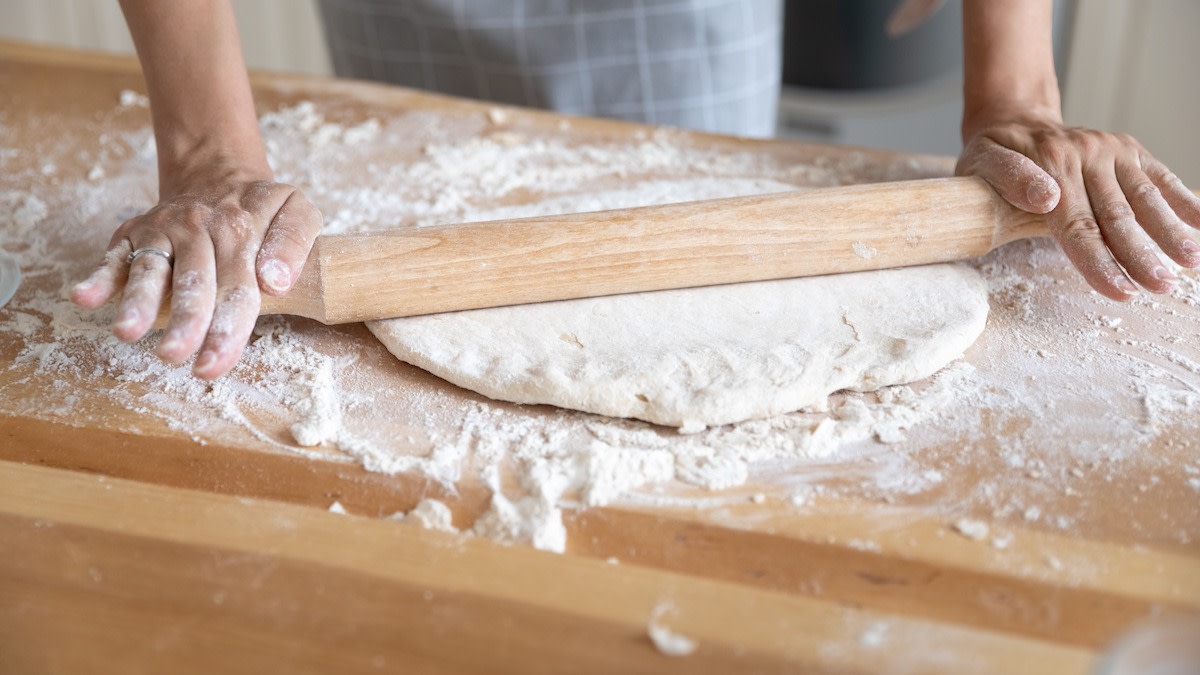
Summary: Whether you use a pasta machine or a rolling pin, the goal is to get the dough as thin as possible without tearing. For most pasta shapes, this means you should be able to see your hand through the sheet of dough when you hold it up to the light.
Quick 5-Step Summary:
Divide the dough into manageable portions.
Flatten a portion with your hand or a rolling pin.
Pass it through the widest setting of your machine.
Fold the dough and pass it through again.
Progressively narrow the machine’s setting.
Time: 15 minutes
Tags: Tools, Technique
💡 Tip: Dust the dough lightly with flour between passes to prevent it from sticking to the machine rollers.
🍝 7. The Machine vs. The Rolling Pin

Summary: A pasta machine provides consistent thickness and saves time, but a simple rolling pin is just as effective and allows for a more rustic texture. Both tools have their merits, and you can achieve excellent results with either one.
Quick 5-Step Summary:
Dust your work surface with flour.
Use a long, thin rolling pin.
Roll from the center outward in all directions.
Rotate the dough often to maintain a round shape.
Continue rolling until the dough is thin and translucent.
Time: 20 minutes
Tags: Tools, Choice
💡 Tip: If using a rolling pin, a long, thin dowel-style pin gives you better control than a heavy, handled one.
🍝 8. Cutting Your Perfect Shapes
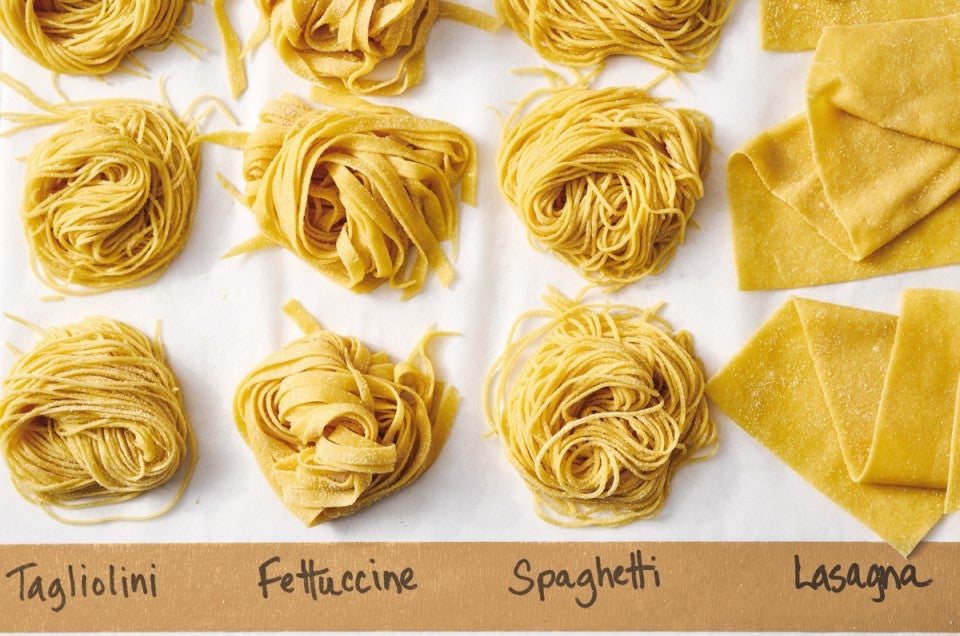
Summary: Once your dough is rolled, you can cut it into any shape you desire. A sharp knife, a pizza cutter, or a pasta machine attachment will work perfectly. Just be sure to dust your pasta with flour to prevent sticking.
Quick 5-Step Summary:
Roll out your pasta sheet.
Use a sharp knife or pizza cutter.
Cut the dough into your desired shapes.
Work quickly so the pasta doesn’t dry out.
Dust the finished pasta with flour.
Time: 10 minutes
Tags: Creativity, Fun
💡 Tip: For delicate shapes like tagliatelle, fold the dough sheet into thirds before slicing to make cutting easier.
🍝 9. The Secret to a Quick, Perfect Cook

Summary: Fresh pasta cooks in a fraction of the time compared to dried pasta. The secret to a perfect cook is using a large pot of aggressively salted, boiling water. This prevents the pasta from clumping and seasons it from the inside out.
Quick 5-Step Summary:
Bring a large pot of water to a rolling boil.
Add a generous amount of salt to the water.
Add the fresh pasta to the boiling water.
Stir immediately to prevent sticking.
Cook for 1-4 minutes until al dente.
Time: 5 minutes
Tags: Cooking, Timing
💡 Tip: Always taste a piece of pasta a minute or two into cooking to check for doneness.
🍝 10. Storing or Drying Your Masterpiece
Summary: Fresh pasta is best cooked immediately, but it can also be stored for later use. You can either freeze it on a baking sheet or dry it on a rack. Both methods preserve the pasta’s quality and allow you to enjoy your hard work another day.
Quick 5-Step Summary:
For freezing, place pasta on a floured baking sheet.
Freeze until firm, then transfer to a freezer bag.
For drying, hang pasta on a drying rack.
Let it air-dry for 12-24 hours.
Store dried pasta in an airtight container.
Time: Varies
Tags: Storage, Preparation
💡 Tip: When freezing, a small amount of flour helps prevent the pasta pieces from sticking to each other.
More Hack Details
The 10 secrets we’ve covered will get you great results every time, but here are a few more details to take your pasta game to the next level. These tips will help you add unique flavors and troubleshoot common problems.
Adding Flavor and Color to Your Dough
Don’t be afraid to get creative with your dough! You can infuse it with color and taste by adding puréed vegetables or herbs. For a vibrant green pasta, blend blanched spinach or basil with your eggs before mixing them into the flour. For a rich orange hue and a hint of sweetness, use a small amount of roasted and puréed butternut squash. Just be mindful of the moisture content; you may need to add a little more flour to compensate for the liquid from the vegetables.
Troubleshooting Common Dough Problems
Even seasoned cooks run into issues. If your dough feels too dry and crumbly, slowly add a few drops of water at a time and continue kneading until it becomes a cohesive ball. If it’s too sticky and unmanageable, knead in a small sprinkle of flour until it reaches a smooth, non-sticky consistency. The key is to make small adjustments and be patient.
Pasta Shape Variations
Your imagination is the only limit when it comes to pasta shapes. For a simple and quick shape, try tagliatelle by folding a floured sheet of pasta and cutting it into thin ribbons. Or, for a more rustic look, use your thumb to press small squares of dough into a concave shape to make orecchiette (little ears). If you have a pasta machine with attachments, you can easily create fettuccine, spaghetti, or lasagna sheets.
History or Origin of Pasta
Pasta has a long, rich history. Its exact origin is a bit of a mystery. Some people think Marco Polo brought it to Italy from China. But records show pasta was eaten in Italy long before he was born.
Ancient Roman writings describe a dish like lasagna. Early pasta was made by hand. It was a simple food for many people.
Over time, pasta making became an art. Different regions of Italy created their own shapes. Today, pasta is a beloved food all over the world. It is a symbol of Italian culture and tradition.
Fresh vs. Dried Pasta
Fresh Pasta
Pros
- Superior Flavor & Texture: Richer, more tender, and luxurious taste.
- Quick Cooking Time: Cooks in just 1-4 minutes.
- More Absorbent: It absorbs sauces better for a more cohesive dish.
- Fun and Rewarding: A great hands-on cooking project.
Cons
- Shorter Shelf Life: Must be eaten within a few days or frozen.
- Time & Effort: Requires more preparation time to make the dough.
- Delicate to Handle: Can tear easily if not handled carefully.
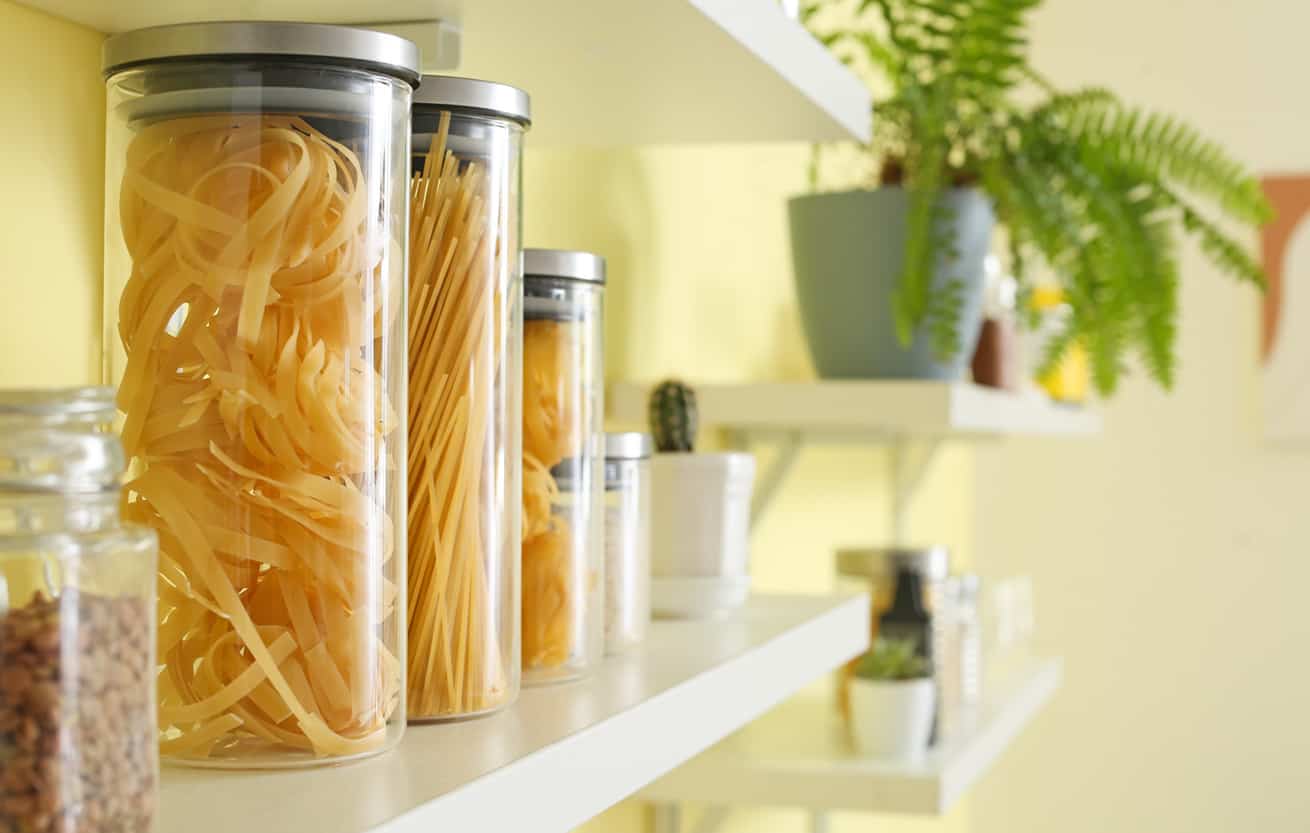
Dried Pasta
Pros
- Long Shelf Life: Can be stored in the pantry for months or years.
- Convenience: It’s ready to cook straight from the box.
- Consistent Results: Reliable texture every time.
- Cost-Effective: Generally much cheaper to buy in bulk.
Cons
- Lacks Fresh Flavor: The taste is less vibrant and rich.
- Longer Cooking Time: Typically requires 8-12 minutes to cook.
- Less Absorbent: The surface is smoother and doesn’t hold sauce as well.
Tools & Equipment Needed for Perfect Pasta
You don’t need a lot of fancy tools. Many of these items are probably in your kitchen already. This is all you need to get started.
- Flour and Eggs: These are your main ingredients.
- A Large Bowl or Clean Countertop: For mixing and kneading the dough.
- A Rolling Pin or Pasta Machine: A rolling pin works just fine. A machine makes it easier.
- A Bench Scraper or Sharp Knife: For cutting the dough into pieces.
- A Large Pot: You need a big pot to boil the pasta properly.
- A Fork: To help you mix the eggs and flour.
FAQ Section
What’s the best flour to use for fresh pasta?
For the best results, use “00” flour, which is a very finely milled Italian flour. It gives the pasta a silky, tender texture. All-purpose flour is also a great option, especially if you are just starting out. It is a good choice for a sturdy and delicious pasta.
Can I make pasta without a machine?
Yes, you absolutely can! You can use a rolling pin to roll the dough out by hand. Just make sure to roll it as thin as you can. A machine just provides more consistent thickness and saves a little time, but it is not essential.
How long does fresh pasta last?
Fresh pasta is best cooked right after you make it. If you need to store it, you can keep it in the fridge for up to two days. For longer storage, you can freeze it for up to one month. Just cook it directly from the freezer.
Why is my dough too sticky or too dry?
The humidity in your home can affect your dough. If it’s too sticky, just add a pinch more flour and knead it in. If it’s too dry and crumbly, add a few drops of water and continue kneading. It’s all about finding the right feel.
What’s the difference between egg and water-based dough?
Egg-based dough is richer and produces a more tender, delicate pasta. It is best for simple sauces that let the pasta flavor shine. Water-based dough is firmer and has a chewier texture. It is better for shapes that need to hold up to a heavy sauce.
Conclusion
You now have all the secrets to making perfect fresh pasta at home. It’s a rewarding process that results in a meal far better than any from a box. With a little practice, you’ll be a pasta master in no time. So grab your flour and eggs and get cooking!
Let me know what your favorite pasta shape is in the comments below! Share this post with a friend who loves to cook, and be sure to pin it on Pinterest for later. Happy cooking!